Here is a quick way to recycle and re-use your old gift bags.It will be so pretty you wonder why you bother buying new ones!
It's super simple- and at practically no cost- so give it a go !
First, go on " Google" , then on " Google Images " , then put in " Victorian Scraps" and get some copyright - free images that you like and print them off.
And here is a detail of what you may get :
Then get yourself an old gift-bag ( ideally plain coloured).
( Ooops-I had already started with the make-over here and have no other picture! ) .
Then, use your Victorian scraps to either cover up brand names or damaged bits on the bag.
The next step is to thread some gingham ribbons through for the handles to give it a bit of a rustic feel.
Take the old string out, push the ribbon through, and make a couple of knots on top of each other at the back.
Here is an overview with the bag now " repaired " with Victorian scraps and with the new handles.
Now for a gift inside.For a simple "Thank you " gift, you may want to give a home-made pot of jam, maybe.
You can find a recipe how to make that here.
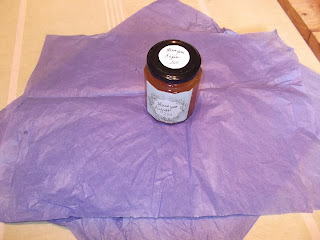
Here is how you wrap it up in tissue paper:
Take two pieces of rectangular tissue paper and place these in more or less straight angles on top of each other.Put your present or jam pot in the middle.
Fold your hands round the tissue paper and pot..
..and tie it at the rim of the pot with some simple string.
Fold some more tissue paper of the same or a contrasting colour into the giftbag and put the present inside.
Put a nice card inside as well with a greeting, thank you, or congratulations.
Now for some more pretty stuff for your giftbag.
I recommend always drying the flowers and flower bouquets you get.Don't throw them away! Once they are really starting to droop, just tie them together with string, and hang them upside down to dry from the ceiling or a hook or nail. Roses usually respond well to this treatment.
Shorten the stems of your dried flowers slightly, then put them on top of the present in the bag and drape the tissue paper around it.
Make a nice bow with some more gingham ribbon around the roses.
And you're done!
Piece of cake ! Happy crafting!!
Enjoy the rest of your week!
XOXO
Bea
P.S.
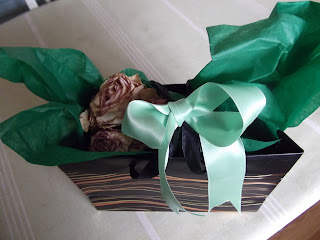
This works with different coloured bags & ribbons as well... as seen here below..
( had some trouble with cat-stalkers ..)
so difficult to get a good shot..
extraordinary"helpful"....
so best to show the bag from another angle...
Hopefully you get the gist of it..!!
linking to
Wow us wednesday
Tablescape Thursday
Transformation Thursday
Thrifty Thursday bloghop
Thursdays Blog Linky Part at Somewhat Simple
Inspiration Friday
Frugal Friday
fridays unfolded
tabletop Tuesday
Wow us wednesdays


8 comments:
Oh, this is a great idea! I'm going to do this. The little images looks great but I love that you changed the handles! So cute.
Be a sweetie,
Shelia ;)
Dearest Bea,
This is a GIFT just by looking at how it evolves in such a JEWEL! You are so incredibly talented and so full of inspirations... My goodness; makes us all dwarf.
Love to you and thanks for you lovely mail!
Mariette
Can't believe I hadn't thought of this before. Love it. TY for sharing.
Would you be so kind to leave a comment on my BLOG ONLY, for the Miracle Makeover fund drive. Charlie, 8 yr. old, & his story are fabulous. Every comment brings us a $1 for the next person that will be sponsored.
Have a beautiful weekend.
Hugs,
TTFN ~
Marydon
You are one clever gal. This post is chock full of ideas for me to "borrow". This is my first visit to your site, so I took some time to browse through your earlier posts. I'm so glad I did that. You've created a beautiful spot for your readers to visit and I really enjoyed the time I spent here. I'll definitely be back.I hope you have a great day. Blessings...Mary
Love the way you re-did the gift bag, and especially love the price :) Thanks for sharing how to wrap the pieces to make the gift most attractive.
Hugs,
Mary
This is just too cute.. love how you reworked the bag. I love this kind of project. hugs ~lynne~
What a great and creative idea. I love it. Such a fabulous gift. Thanks so much for joining TTT. Hugs, Marty
I reuse gift bags all the time - but never tho't of changing out the handles w/ pretty ribbon. Cute!!
Post a Comment