Friday, 30 December 2011

Meet and Make -the designer behind Modern Country Lady on www.favecraftsblog.com

I hope you had a good couple of days and a lovely and relaxing Christmas.I have been pretty busy working on new designs and for the rest generally relaxing  a bit.I am also in the middle of translating my Etsy shop into another extra language apart from English AND have just been featured on as a craft designer with my blog and Etsyshop on www.favecraftsblog .com ....... what a fabulous and exciting way to end the old year! :-)
It's a fun feature with a project...

and 10 fun facts and some more information about me.
Here is a taster..
10 fun facts about me ..

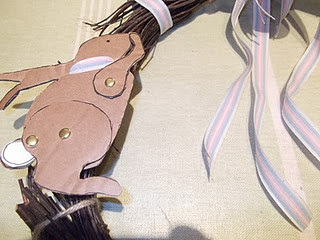
  1. I LOVE cardboard – the possibilities are endless.
  2. In case of extreme happiness, I drink tea – and lots of it.
  3. I love looking in skips ( dumpsters) for discarded furniture that I can do up.
  4. My garage is overflowing with bits and bobs  that ” may come in handy one day”.
  5. My four “furbabies” have all been either the inspiration for craft projects or very “helpful” during them.
  6. I get my best ideas when walking my two dogs, Maud and Millie.
  7. I love reading flower seed catalogs in winter.
  8. I can’t live without my camera.
  9. In case of extreme disaster I eat chocolate .
  10. I have my own power drill and glue gun, which I don’t let anyone use


You can read the rest of the article  here


Happy New Year everyone!!
XOXO
Bea

Sunday, 25 December 2011

Merry Christmas


Wishing you all a wonderful and very happy Christmas day from all of us at Modern Country Lady.
Have a great Christmas.
XOXO
Bea

Saturday, 24 December 2011

Home for Christmas

                                    
                 Nothing like a feel-good movie in the holidays!
And what would be better than some doggie film .


Perfect!


Thank goodness it's got a happy ending !!
Have a great and stressfree 24th of December!
XOXO
Bea

Giftwrapping from recycled cards and recycled Christmas baubles


I don't know about you, but I was still wrapping gifts yesterday, and I thought to write this post to help you to give your gifts that extra bit of oompf .
All you need is some old Christmas cards and some leftover Christmas baubles .Together, they can make your presents really special.
Here below are some examples which hope will inspire you.(You will need a glue gun ).
Here is an example .
Start with a relatively neutral paper.I bought this 10 meter roll of green Christmas paper for £ 1,- .in a charity shop.
Wrap your present.

Add some baubles.

Add a card you like and that you think goes well with the baubles....

Add a ribbon that goes well with the card and the baubles.
Add some more ribbon if you like and a gift tag.

and you're done!

Here is another example..
Wrap your present...

Add a card that you like...


add some baubles..
..and some Christmas ornaments that echo the scene on the card...

Some more ribbons and you're done !

And one more :
Wrap.


Add some fake berries..

Add a Christmas decoration...

Add some more fake flowers and baubles..

and add a gift tag and you're done!

Happy wrapping!
XOXO
Bea

linking to
inspiration friday

Sunday, 18 December 2011

Christmas preparations


Nothing like an advents-wreath - I had no time to make this or hang this up earlier as I was so incredibly busy .
It's proper Christmas to me -blooming lovely !!
 You can make your basic wreaths easily from some willow branches, I made loads this weekend- here's my supply :-)

I had stocked up on pine cones a week before on a walk in the local forest.

Add some local apples - plus some evergreen branches and holly from the garden and then it was action stations this weekend..

A wreath for the front door- ( gingham + evergreen always works for me) ..got a bit carried away and made in fact three!!

Then the advents wreath..


You can attach your apples to your wreaths by just sticking a stretch of garden wire through the apple, and then attach the apple by twisting the two ends that come  out of the apple around the wreath and then around each other.Same for the pine cones really.Add holly to your taste , sprinkle with Christmas cheer and you're done.
I was suffering a bit from pre-Christmas fatigue so tried to minimise the workload.A bit of a tip: put some baubles in a clear glass vase..


 ..add a wreath.. some candles..and you're done..
I did this here as well... a whole stack of silver coloured baubles...add some small Christmas trees and a wreath and some candles- hey presto!
Instant Christmas ! Sit down and relax!!

Here's some more Christmassy shots to keep you in the right Christmas mood..the fireplace...

My desk with the mirror and the wreath of recycled baubles I made in an earlier post..

and our tree- this year an all-colour one..

And to all you non- catlovers out there- to paraphrase Robert Evans : " The cat stays in the picture! ".

Wishing you a very  calm and relaxing week leading up to Christmas.
XOXO
Bea

linking to
metamorphis monday


Tuesday, 13 December 2011

Christmas biscuits- Bunte Teller


 In the time leading up to Christmas, there is a tradition in Germany, called " Bunte Teller"( colourful plates) because of all the colours- all around the house, there are dishes with biscuits  with other Christmassy things like gilded walnuts, clementines and candy-canes so the smaller and bigger members of the family have something to nibble at .I thought this would be a great time to make some of these biscuits.This is a slight recap of last year but I am sure you will enjoy making these!!                                                             

Theses rustic iced biscuits are also great fun s to hang from your Christmas tree or wreath as decoration- the recipe is at the bottom of this post. It's mainly butter, sugar, eggs and flour and some icing sugar - see the ingredients here below.


After you have made the dough ( accordig to the recipe that will follow), roll out the whole thing with a rolling pin and cut out the biscuits with a start-shaped cookie cutter.


                                                          Here you see the biscuits cut out .
Then bake according to the recipe at the bottom of this page and cool on a metal grid as below.


After the biscuits are cooled down,  ice them ,  put a small whole through them , and thread some string through , so you can hang them up as here below.This is also a very inexpensive way to decorate your Christmas tree, by the way.
Thread the iced biscuits through with cotton string .


                                                 Below the recipe for the Christmas biscuits.

Ingredients:
85 gr butter
100 gr caster sugar
1 egg
2 teaspoons vanilla sugar
200 gr flour
1 teaspoon baking powder
1 teaspoon salt
300 gr icing sugar

How to make the biscuits:
Pre-heat the oven ( 180 degrees centigrade).Cream the butter and sugar, then beat in the egg and vanilla sugar.Put the flour, salt and baking powder in a separate bowl, then add to the butter mixture.
Sprinkle out some flour on your kitchen table or worktop and roll out the dough. Butter 2 baking trays.Cut out as many stars as you can with a star-shaped cookie cutter, and place on the trays.


 You will have some dough left : sprinkle some more flour on your worktop , roll the remaining dough again into a ball and repeat the cutting out till you have your two trays full of dough stars.
Bake for about 10 minutes or so- keep an eye out: the bisuits should colour aroun the edges and not get too dark.Take the biscuits out and let them cool on a metal grid.


Let the biscuits cool down.Make the icing by adding a couple of hot water to the icng sugar, so it forms a thick paste.Spread the icing on the bisuits with the back of a teaspoon.


                                             Take a very tiny pointed object ( tip of embroidery scissors will do ) and wriggle this in carefully at the top of your biscuit , all the way through, and make a small hole that way.
Thread some cotton string through this and your biscuit is ready for your wreath.
                                                                *  *   *  *  *  *

While we are nice and warm inside, remember that snow and ice are no fun for the birds.. so put some food out if you can !!


Happy baking !!
XOXO
Bea


Friday, 9 December 2011

It's all about the plates.....Christmas plates and crockery addiction ...


How do you feel about Christmas crockery?As you can see I am all for it, ....but I have to admit I have built it up over the years till I can change the whole of my Welsh dresser with Christmas plates and cups around Christmas..
                                      This red and white mug here below and it's brother were for a long time the only Christmas crockery I had..and I had not even bought it around Christmas, but one summer at an airport lounge in Amsterdam !
These red bowls and the square shaped serving dishes with the reindeer wearing a scarf I bought a few years later..
Reindeer + scarf = perfect Christmas nonsense, as far as I am concerned.
The year after, I managed to get hold of these stripey green and red mugs, with this " handstitched" decoration..they are perfect for a big mug of tea, and I am slightly ashamed to admit I actually used them e-v-e-r-y day instead of only around Christmas....ooops.
The small plates with Santa holding a present on the dresser-here below, and the bigger plates with Santa and Rudolph I bought at the same time..

Here you can see more of the plates..
.. and here they are too in one row..


The only downside is, the quality- it's sturdy - but I would love it ot be proper porcelain or bone china- that just feels so much nicer.This for instance, here below ( which you can find here) is from Villeroy and Boch, and I am sure that has a completely different feel to it.

My favourite producer of porcelain is Herend..I have a few of these plates, called Herend Apponyi Gruen..
This one you can find here for instance. But the downside is, they are so nice ( and also so expensive) that you daren't use them- son that's no good either !!
I love porcelain and plates and crockery, but I don't want to end up with no more space and all the cupboards full of china and nowhere to put anything so I may have to pass this year on more Christmas plates and mugs..
But then again, maybe one or two.. who knows. No! Better not!!
How are you with Christmas plates? All stacked up or still space in the cupboard?
Have a great weekend!!
XOXO
Bea


linking to
Inspiration Friday
Fancy this Fridays
Show and tell friday
Metamorphosis Monday